<P>
<TABLE Table style="WIDTH: 453.75pt; mso-cellspacing: 0cm; mso-padding-alt: 0cm 0cm 0cm 0cm" cellSpacing=0 cellPadding=0 width=605 border=0>
<TBODY>
<TR style="HEIGHT: 11.25pt; mso-yfti-irow: 0; mso-yfti-firstrow: yes">
<TD style="BORDER-RIGHT: #ebebeb; PADDING-RIGHT: 0cm; BORDER-TOP: #ebebeb; PADDING-LEFT: 0cm; PADDING-BOTTOM: 0cm; BORDER-LEFT: #ebebeb; WIDTH: 177pt; PADDING-TOP: 0cm; BORDER-BOTTOM: #ebebeb; HEIGHT: 11.25pt; BACKGROUND-COLOR: transparent" vAlign=top width=236 rowSpan=8>
<P style="MARGIN: 0cm 0cm 0pt; WORD-BREAK: keep-all; TEXT-AUTOSPACE: ideograph-numeric; TEXT-ALIGN: left; mso-pagination: widow-orphan" align=left><SPAN style="COLOR: blue; FONT-FAMILY: 'Verdana','sans-serif'; ; mso-fareast-font-family: 굴림; mso-bidi-font-family: 굴림; mso-font-kerning: 0pt"><FONT size=2>Tunicate Bulbs - Propagation by Seed - Method I</FONT></SPAN><SPAN style="FONT-SIZE: 12pt; FONT-FAMILY: 굴림; mso-bidi-font-family: 굴림; mso-font-kerning: 0pt"><FONT color=#000000> </FONT></SPAN></P>
<P style="MARGIN: 0cm 0cm 0pt; WORD-BREAK: keep-all; TEXT-AUTOSPACE: ideograph-numeric; TEXT-ALIGN: left; mso-pagination: widow-orphan" align=left><SPAN style="FONT-SIZE: 12pt; FONT-FAMILY: 굴림; mso-bidi-font-family: 굴림; mso-font-kerning: 0pt"></SPAN><SPAN style="FONT-FAMILY: 'Verdana','sans-serif'; ; mso-fareast-font-family: 굴림; mso-bidi-font-family: 굴림; mso-font-kerning: 0pt"><FONT size=2><FONT color=#000000>Example:&nbsp; Amaryllis</FONT></FONT></SPAN></P>
<P style="MARGIN: 0cm 0cm 0pt; WORD-BREAK: keep-all; TEXT-AUTOSPACE: ideograph-numeric; TEXT-ALIGN: left; mso-pagination: widow-orphan; mso-margin-top-alt: auto; mso-margin-bottom-alt: auto" align=left><SPAN style="FONT-FAMILY: 'Verdana','sans-serif'; ; mso-fareast-font-family: 굴림; mso-bidi-font-family: 굴림; mso-font-kerning: 0pt"><FONT size=2><FONT color=#000000></FONT></FONT></SPAN>&nbsp;</P>
<P style="MARGIN: 0cm 0cm 0pt; WORD-BREAK: keep-all; TEXT-AUTOSPACE: ideograph-numeric; TEXT-ALIGN: left; mso-pagination: widow-orphan; mso-margin-top-alt: auto; mso-margin-bottom-alt: auto" align=left><SPAN style="FONT-FAMILY: 'Verdana','sans-serif'; ; mso-fareast-font-family: 굴림; mso-bidi-font-family: 굴림; mso-font-kerning: 0pt"><FONT size=2><FONT color=#000000></FONT></FONT></SPAN>&nbsp;</P>
<P style="MARGIN: 0cm 0cm 0pt; WORD-BREAK: keep-all; TEXT-AUTOSPACE: ideograph-numeric; TEXT-ALIGN: left; mso-pagination: widow-orphan; mso-margin-top-alt: auto; mso-margin-bottom-alt: auto" align=left><SPAN style="FONT-FAMILY: 'Verdana','sans-serif'; ; mso-fareast-font-family: 굴림; mso-bidi-font-family: 굴림; mso-font-kerning: 0pt"><FONT size=2><FONT color=#000000></FONT></FONT></SPAN>&nbsp;</P>
<P style="MARGIN: 0cm 0cm 0pt; WORD-BREAK: keep-all; TEXT-AUTOSPACE: ideograph-numeric; TEXT-ALIGN: left; mso-pagination: widow-orphan; mso-margin-top-alt: auto; mso-margin-bottom-alt: auto" align=left><SPAN style="FONT-FAMILY: 'Verdana','sans-serif'; ; mso-fareast-font-family: 굴림; mso-bidi-font-family: 굴림; mso-font-kerning: 0pt"><FONT size=2><FONT color=#000000>Step 1.&nbsp; Place 4 sheets of unscented two ply facial tissues on a plate.&nbsp; Add one tablespoon of water and let the tissues absorb the water.</FONT></FONT></SPAN></P>
<P style="MARGIN: 0cm 0cm 0pt; WORD-BREAK: keep-all; TEXT-AUTOSPACE: ideograph-numeric; TEXT-ALIGN: left; mso-pagination: widow-orphan; mso-margin-top-alt: auto; mso-margin-bottom-alt: auto" align=left><SPAN style="FONT-FAMILY: 'Verdana','sans-serif'; ; mso-fareast-font-family: 굴림; mso-bidi-font-family: 굴림; mso-font-kerning: 0pt"><FONT size=2><FONT color=#000000></FONT></FONT></SPAN>&nbsp;</P>
<P style="MARGIN: 0cm 0cm 0pt; WORD-BREAK: keep-all; TEXT-AUTOSPACE: ideograph-numeric; TEXT-ALIGN: left; mso-pagination: widow-orphan; mso-margin-top-alt: auto; mso-margin-bottom-alt: auto" align=left><SPAN style="FONT-FAMILY: 'Verdana','sans-serif'; ; mso-fareast-font-family: 굴림; mso-bidi-font-family: 굴림; mso-font-kerning: 0pt"><FONT size=2><FONT color=#000000></FONT></FONT></SPAN>&nbsp;</P>
<P style="MARGIN: 0cm 0cm 0pt; WORD-BREAK: keep-all; TEXT-AUTOSPACE: ideograph-numeric; TEXT-ALIGN: left; mso-pagination: widow-orphan; mso-margin-top-alt: auto; mso-margin-bottom-alt: auto" align=left><SPAN style="FONT-FAMILY: 'Verdana','sans-serif'; ; mso-fareast-font-family: 굴림; mso-bidi-font-family: 굴림; mso-font-kerning: 0pt"><FONT size=2><FONT color=#000000></FONT></FONT></SPAN>&nbsp;</P>
<P style="MARGIN: 0cm 0cm 0pt; WORD-BREAK: keep-all; TEXT-AUTOSPACE: ideograph-numeric; TEXT-ALIGN: left; mso-pagination: widow-orphan; mso-margin-top-alt: auto; mso-margin-bottom-alt: auto" align=left><SPAN style="FONT-FAMILY: 'Verdana','sans-serif'; ; mso-fareast-font-family: 굴림; mso-bidi-font-family: 굴림; mso-font-kerning: 0pt"><FONT size=2><FONT color=#000000></FONT></FONT></SPAN>&nbsp;</P>
<P style="MARGIN: 0cm 0cm 0pt; WORD-BREAK: keep-all; TEXT-AUTOSPACE: ideograph-numeric; TEXT-ALIGN: left; mso-pagination: widow-orphan; mso-margin-top-alt: auto; mso-margin-bottom-alt: auto" align=left><SPAN style="FONT-FAMILY: 'Verdana','sans-serif'; ; mso-fareast-font-family: 굴림; mso-bidi-font-family: 굴림; mso-font-kerning: 0pt"><FONT size=2><FONT color=#000000></FONT></FONT></SPAN>&nbsp;</P>
<P style="MARGIN: 0cm 0cm 0pt; WORD-BREAK: keep-all; TEXT-AUTOSPACE: ideograph-numeric; TEXT-ALIGN: left; mso-pagination: widow-orphan; mso-margin-top-alt: auto; mso-margin-bottom-alt: auto" align=left><SPAN style="FONT-FAMILY: 'Verdana','sans-serif'; ; mso-fareast-font-family: 굴림; mso-bidi-font-family: 굴림; mso-font-kerning: 0pt"><FONT size=2><FONT color=#000000></FONT></FONT></SPAN>&nbsp;</P>
<P style="MARGIN: 0cm 0cm 0pt; WORD-BREAK: keep-all; TEXT-AUTOSPACE: ideograph-numeric; TEXT-ALIGN: left; mso-pagination: widow-orphan; mso-margin-top-alt: auto; mso-margin-bottom-alt: auto" align=left><SPAN style="FONT-FAMILY: 'Verdana','sans-serif'; ; mso-fareast-font-family: 굴림; mso-bidi-font-family: 굴림; mso-font-kerning: 0pt"><FONT size=2><FONT color=#000000>Step 2. Arrange the seeds on the center of the tissues so that they are approximately 1 or 2 inches apart.</FONT></FONT></SPAN></P>
<P style="MARGIN: 0cm 0cm 0pt; WORD-BREAK: keep-all; TEXT-AUTOSPACE: ideograph-numeric; TEXT-ALIGN: left; mso-pagination: widow-orphan; mso-margin-top-alt: auto; mso-margin-bottom-alt: auto" align=left><SPAN style="FONT-FAMILY: 'Verdana','sans-serif'; ; mso-fareast-font-family: 굴림; mso-bidi-font-family: 굴림; mso-font-kerning: 0pt"><FONT size=2><FONT color=#000000></FONT></FONT></SPAN>&nbsp;</P>
<P style="MARGIN: 0cm 0cm 0pt; WORD-BREAK: keep-all; TEXT-AUTOSPACE: ideograph-numeric; TEXT-ALIGN: left; mso-pagination: widow-orphan; mso-margin-top-alt: auto; mso-margin-bottom-alt: auto" align=left><SPAN style="FONT-FAMILY: 'Verdana','sans-serif'; ; mso-fareast-font-family: 굴림; mso-bidi-font-family: 굴림; mso-font-kerning: 0pt"><FONT size=2><FONT color=#000000></FONT></FONT></SPAN>&nbsp;</P>
<P style="MARGIN: 0cm 0cm 0pt; WORD-BREAK: keep-all; TEXT-AUTOSPACE: ideograph-numeric; TEXT-ALIGN: left; mso-pagination: widow-orphan; mso-margin-top-alt: auto; mso-margin-bottom-alt: auto" align=left><SPAN style="FONT-FAMILY: 'Verdana','sans-serif'; ; mso-fareast-font-family: 굴림; mso-bidi-font-family: 굴림; mso-font-kerning: 0pt"><FONT size=2><FONT color=#000000></FONT></FONT></SPAN>&nbsp;</P>
<P style="MARGIN: 0cm 0cm 0pt; WORD-BREAK: keep-all; TEXT-AUTOSPACE: ideograph-numeric; TEXT-ALIGN: left; mso-pagination: widow-orphan; mso-margin-top-alt: auto; mso-margin-bottom-alt: auto" align=left><SPAN style="FONT-FAMILY: 'Verdana','sans-serif'; ; mso-fareast-font-family: 굴림; mso-bidi-font-family: 굴림; mso-font-kerning: 0pt"><FONT size=2><FONT color=#000000></FONT></FONT></SPAN>&nbsp;</P>
<P style="MARGIN: 0cm 0cm 0pt; WORD-BREAK: keep-all; TEXT-AUTOSPACE: ideograph-numeric; TEXT-ALIGN: left; mso-pagination: widow-orphan; mso-margin-top-alt: auto; mso-margin-bottom-alt: auto" align=left><SPAN style="FONT-FAMILY: 'Verdana','sans-serif'; ; mso-fareast-font-family: 굴림; mso-bidi-font-family: 굴림; mso-font-kerning: 0pt"><FONT size=2><FONT color=#000000></FONT></FONT></SPAN>&nbsp;</P>
<P style="MARGIN: 0cm 0cm 0pt; WORD-BREAK: keep-all; TEXT-AUTOSPACE: ideograph-numeric; TEXT-ALIGN: left; mso-pagination: widow-orphan; mso-margin-top-alt: auto; mso-margin-bottom-alt: auto" align=left><SPAN style="FONT-FAMILY: 'Verdana','sans-serif'; ; mso-fareast-font-family: 굴림; mso-bidi-font-family: 굴림; mso-font-kerning: 0pt"><FONT size=2><FONT color=#000000></FONT></FONT></SPAN>&nbsp;</P>
<P style="MARGIN: 0cm 0cm 0pt; WORD-BREAK: keep-all; TEXT-AUTOSPACE: ideograph-numeric; TEXT-ALIGN: left; mso-pagination: widow-orphan; mso-margin-top-alt: auto; mso-margin-bottom-alt: auto" align=left><SPAN style="FONT-FAMILY: 'Verdana','sans-serif'; ; mso-fareast-font-family: 굴림; mso-bidi-font-family: 굴림; mso-font-kerning: 0pt"><FONT size=2><FONT color=#000000></FONT></FONT></SPAN>&nbsp;</P>
<P style="MARGIN: 0cm 0cm 0pt; WORD-BREAK: keep-all; TEXT-AUTOSPACE: ideograph-numeric; TEXT-ALIGN: left; mso-pagination: widow-orphan; mso-margin-top-alt: auto; mso-margin-bottom-alt: auto" align=left><SPAN style="FONT-FAMILY: 'Verdana','sans-serif'; ; mso-fareast-font-family: 굴림; mso-bidi-font-family: 굴림; mso-font-kerning: 0pt"><FONT size=2><FONT color=#000000></FONT></FONT></SPAN>&nbsp;</P>
<P style="MARGIN: 0cm 0cm 0pt; WORD-BREAK: keep-all; TEXT-AUTOSPACE: ideograph-numeric; TEXT-ALIGN: left; mso-pagination: widow-orphan; mso-margin-top-alt: auto; mso-margin-bottom-alt: auto" align=left><SPAN style="FONT-FAMILY: 'Verdana','sans-serif'; ; mso-fareast-font-family: 굴림; mso-bidi-font-family: 굴림; mso-font-kerning: 0pt"><FONT size=2><FONT color=#000000></FONT></FONT></SPAN>&nbsp;</P>
<P style="MARGIN: 0cm 0cm 0pt; WORD-BREAK: keep-all; TEXT-AUTOSPACE: ideograph-numeric; TEXT-ALIGN: left; mso-pagination: widow-orphan; mso-margin-top-alt: auto; mso-margin-bottom-alt: auto" align=left><SPAN style="FONT-FAMILY: 'Verdana','sans-serif'; ; mso-fareast-font-family: 굴림; mso-bidi-font-family: 굴림; mso-font-kerning: 0pt"><FONT size=2><FONT color=#000000></FONT></FONT></SPAN>&nbsp;</P>
<P style="MARGIN: 0cm 0cm 0pt; WORD-BREAK: keep-all; TEXT-AUTOSPACE: ideograph-numeric; TEXT-ALIGN: left; mso-pagination: widow-orphan; mso-margin-top-alt: auto; mso-margin-bottom-alt: auto" align=left><SPAN style="FONT-FAMILY: 'Verdana','sans-serif'; ; mso-fareast-font-family: 굴림; mso-bidi-font-family: 굴림; mso-font-kerning: 0pt"><FONT size=2><FONT color=#000000></FONT></FONT></SPAN>&nbsp;</P>
<P style="MARGIN: 0cm 0cm 0pt; WORD-BREAK: keep-all; TEXT-AUTOSPACE: ideograph-numeric; TEXT-ALIGN: left; mso-pagination: widow-orphan; mso-margin-top-alt: auto; mso-margin-bottom-alt: auto" align=left><SPAN style="FONT-FAMILY: 'Verdana','sans-serif'; ; mso-fareast-font-family: 굴림; mso-bidi-font-family: 굴림; mso-font-kerning: 0pt"><FONT size=2><FONT color=#000000></FONT></FONT></SPAN>&nbsp;</P>
<P style="MARGIN: 0cm 0cm 0pt; WORD-BREAK: keep-all; TEXT-AUTOSPACE: ideograph-numeric; TEXT-ALIGN: left; mso-pagination: widow-orphan; mso-margin-top-alt: auto; mso-margin-bottom-alt: auto" align=left><SPAN style="FONT-FAMILY: 'Verdana','sans-serif'; ; mso-fareast-font-family: 굴림; mso-bidi-font-family: 굴림; mso-font-kerning: 0pt"><FONT size=2><FONT color=#000000></FONT></FONT></SPAN>&nbsp;</P>
<P style="MARGIN: 0cm 0cm 0pt; WORD-BREAK: keep-all; TEXT-AUTOSPACE: ideograph-numeric; TEXT-ALIGN: left; mso-pagination: widow-orphan; mso-margin-top-alt: auto; mso-margin-bottom-alt: auto" align=left><SPAN style="FONT-FAMILY: 'Verdana','sans-serif'; ; mso-fareast-font-family: 굴림; mso-bidi-font-family: 굴림; mso-font-kerning: 0pt"><FONT size=2><FONT color=#000000></FONT></FONT></SPAN>&nbsp;</P>
<P style="MARGIN: 0cm 0cm 0pt; WORD-BREAK: keep-all; TEXT-AUTOSPACE: ideograph-numeric; TEXT-ALIGN: left; mso-pagination: widow-orphan; mso-margin-top-alt: auto; mso-margin-bottom-alt: auto" align=left><SPAN style="FONT-FAMILY: 'Verdana','sans-serif'; ; mso-fareast-font-family: 굴림; mso-bidi-font-family: 굴림; mso-font-kerning: 0pt"><FONT size=2><FONT color=#000000></FONT></FONT></SPAN>&nbsp;</P>
<P style="MARGIN: 0cm 0cm 0pt; WORD-BREAK: keep-all; TEXT-AUTOSPACE: ideograph-numeric; TEXT-ALIGN: left; mso-pagination: widow-orphan; mso-margin-top-alt: auto; mso-margin-bottom-alt: auto" align=left><SPAN style="FONT-FAMILY: 'Verdana','sans-serif'; ; mso-fareast-font-family: 굴림; mso-bidi-font-family: 굴림; mso-font-kerning: 0pt"><FONT size=2><FONT color=#000000></FONT></FONT></SPAN>&nbsp;</P>
<P style="MARGIN: 0cm 0cm 0pt; WORD-BREAK: keep-all; TEXT-AUTOSPACE: ideograph-numeric; TEXT-ALIGN: left; mso-pagination: widow-orphan; mso-margin-top-alt: auto; mso-margin-bottom-alt: auto" align=left><SPAN style="FONT-FAMILY: 'Verdana','sans-serif'; ; mso-fareast-font-family: 굴림; mso-bidi-font-family: 굴림; mso-font-kerning: 0pt"><FONT size=2><FONT color=#000000></FONT></FONT></SPAN>&nbsp;</P>
<P style="MARGIN: 0cm 0cm 0pt; WORD-BREAK: keep-all; TEXT-AUTOSPACE: ideograph-numeric; TEXT-ALIGN: left; mso-pagination: widow-orphan; mso-margin-top-alt: auto; mso-margin-bottom-alt: auto" align=left><SPAN style="FONT-FAMILY: 'Verdana','sans-serif'; ; mso-fareast-font-family: 굴림; mso-bidi-font-family: 굴림; mso-font-kerning: 0pt"><FONT size=2><FONT color=#000000></FONT></FONT></SPAN>&nbsp;</P>
<P style="MARGIN: 0cm 0cm 0pt; WORD-BREAK: keep-all; TEXT-AUTOSPACE: ideograph-numeric; TEXT-ALIGN: left; mso-pagination: widow-orphan; mso-margin-top-alt: auto; mso-margin-bottom-alt: auto" align=left><SPAN style="FONT-FAMILY: 'Verdana','sans-serif'; ; mso-fareast-font-family: 굴림; mso-bidi-font-family: 굴림; mso-font-kerning: 0pt"><FONT size=2><FONT color=#000000>Step 3.&nbsp; Gently fold the left 1/3 of the tissue toward the center of the sheets covering half of the seeds.&nbsp; Then fold the right 1/3 over the seeds toward the middle, covering the rest of the seeds.&nbsp; Do not press the sheets of tissue down.&nbsp; They should fold loosely over the seeds and form a 'package' of sorts...</FONT></FONT></SPAN></P>
<P style="MARGIN: 0cm 0cm 0pt; WORD-BREAK: keep-all; TEXT-AUTOSPACE: ideograph-numeric; TEXT-ALIGN: left; mso-pagination: widow-orphan; mso-margin-top-alt: auto; mso-margin-bottom-alt: auto" align=left><SPAN style="FONT-FAMILY: 'Verdana','sans-serif'; ; mso-fareast-font-family: 굴림; mso-bidi-font-family: 굴림; mso-font-kerning: 0pt"></SPAN>&nbsp;</P>
<P style="MARGIN: 0cm 0cm 0pt; WORD-BREAK: keep-all; TEXT-AUTOSPACE: ideograph-numeric; TEXT-ALIGN: left; mso-pagination: widow-orphan; mso-margin-top-alt: auto; mso-margin-bottom-alt: auto" align=left><SPAN style="FONT-FAMILY: 'Verdana','sans-serif'; ; mso-fareast-font-family: 굴림; mso-bidi-font-family: 굴림; mso-font-kerning: 0pt"></SPAN>&nbsp;</P>
<P style="MARGIN: 0cm 0cm 0pt; WORD-BREAK: keep-all; TEXT-AUTOSPACE: ideograph-numeric; TEXT-ALIGN: left; mso-pagination: widow-orphan; mso-margin-top-alt: auto; mso-margin-bottom-alt: auto" align=left><SPAN style="FONT-FAMILY: 'Verdana','sans-serif'; ; mso-fareast-font-family: 굴림; mso-bidi-font-family: 굴림; mso-font-kerning: 0pt"></SPAN>&nbsp;</P>
<P style="MARGIN: 0cm 0cm 0pt; WORD-BREAK: keep-all; TEXT-AUTOSPACE: ideograph-numeric; TEXT-ALIGN: left; mso-pagination: widow-orphan; mso-margin-top-alt: auto; mso-margin-bottom-alt: auto" align=left><SPAN style="FONT-FAMILY: 'Verdana','sans-serif'; ; mso-fareast-font-family: 굴림; mso-bidi-font-family: 굴림; mso-font-kerning: 0pt"></SPAN>&nbsp;</P>
<P style="MARGIN: 0cm 0cm 0pt; WORD-BREAK: keep-all; TEXT-AUTOSPACE: ideograph-numeric; TEXT-ALIGN: left; mso-pagination: widow-orphan; mso-margin-top-alt: auto; mso-margin-bottom-alt: auto" align=left><SPAN style="FONT-FAMILY: 'Verdana','sans-serif'; ; mso-fareast-font-family: 굴림; mso-bidi-font-family: 굴림; mso-font-kerning: 0pt"></SPAN>&nbsp;</P>
<P style="MARGIN: 0cm 0cm 0pt; WORD-BREAK: keep-all; TEXT-AUTOSPACE: ideograph-numeric; TEXT-ALIGN: left; mso-pagination: widow-orphan; mso-margin-top-alt: auto; mso-margin-bottom-alt: auto" align=left><SPAN style="FONT-FAMILY: 'Verdana','sans-serif'; ; mso-fareast-font-family: 굴림; mso-bidi-font-family: 굴림; mso-font-kerning: 0pt"></SPAN>&nbsp;</P>
<P style="MARGIN: 0cm 0cm 0pt; WORD-BREAK: keep-all; TEXT-AUTOSPACE: ideograph-numeric; TEXT-ALIGN: left; mso-pagination: widow-orphan; mso-margin-top-alt: auto; mso-margin-bottom-alt: auto" align=left><SPAN style="FONT-FAMILY: 'Verdana','sans-serif'; ; mso-fareast-font-family: 굴림; mso-bidi-font-family: 굴림; mso-font-kerning: 0pt"></SPAN>&nbsp;</P>
<P style="MARGIN: 0cm 0cm 0pt; WORD-BREAK: keep-all; TEXT-AUTOSPACE: ideograph-numeric; TEXT-ALIGN: left; mso-pagination: widow-orphan; mso-margin-top-alt: auto; mso-margin-bottom-alt: auto" align=left><SPAN style="FONT-FAMILY: 'Verdana','sans-serif'; ; mso-fareast-font-family: 굴림; mso-bidi-font-family: 굴림; mso-font-kerning: 0pt"></SPAN>&nbsp;</P>
<P style="MARGIN: 0cm 0cm 0pt; WORD-BREAK: keep-all; TEXT-AUTOSPACE: ideograph-numeric; TEXT-ALIGN: left; mso-pagination: widow-orphan; mso-margin-top-alt: auto; mso-margin-bottom-alt: auto" align=left><SPAN style="FONT-FAMILY: 'Verdana','sans-serif'; ; mso-fareast-font-family: 굴림; mso-bidi-font-family: 굴림; mso-font-kerning: 0pt"></SPAN>&nbsp;</P>
<P style="MARGIN: 0cm 0cm 0pt; WORD-BREAK: keep-all; TEXT-AUTOSPACE: ideograph-numeric; TEXT-ALIGN: left; mso-pagination: widow-orphan; mso-margin-top-alt: auto; mso-margin-bottom-alt: auto" align=left><SPAN style="FONT-FAMILY: 'Verdana','sans-serif'; ; mso-fareast-font-family: 굴림; mso-bidi-font-family: 굴림; mso-font-kerning: 0pt"></SPAN><SPAN style="FONT-FAMILY: 'Verdana','sans-serif'; ; mso-fareast-font-family: 굴림; mso-bidi-font-family: 굴림; mso-font-kerning: 0pt"><FONT size=2><FONT color=#000000>Step 4. Insert this newly formed 'package' into a gallon zippered storage bag which should hold two of these 'packages'.&nbsp; Zip the storage bag tight, so that no moisture will be lost. Be careful not to press down on the tissues and leave just a little air inside.</FONT></FONT></SPAN></P>
<P style="MARGIN: 0cm 0cm 0pt; WORD-BREAK: keep-all; TEXT-AUTOSPACE: ideograph-numeric; TEXT-ALIGN: left; mso-pagination: widow-orphan; mso-margin-top-alt: auto; mso-margin-bottom-alt: auto" align=left><SPAN style="FONT-FAMILY: 'Verdana','sans-serif'; ; mso-fareast-font-family: 굴림; mso-bidi-font-family: 굴림; mso-font-kerning: 0pt"><FONT size=2><FONT color=#000000></FONT></FONT></SPAN>&nbsp;</P>
<P style="MARGIN: 0cm 0cm 0pt; WORD-BREAK: keep-all; TEXT-AUTOSPACE: ideograph-numeric; TEXT-ALIGN: left; mso-pagination: widow-orphan; mso-margin-top-alt: auto; mso-margin-bottom-alt: auto" align=left><SPAN style="FONT-FAMILY: 'Verdana','sans-serif'; ; mso-fareast-font-family: 굴림; mso-bidi-font-family: 굴림; mso-font-kerning: 0pt"><FONT size=2><FONT color=#000000></FONT></FONT></SPAN>&nbsp;</P>
<P style="MARGIN: 0cm 0cm 0pt; WORD-BREAK: keep-all; TEXT-AUTOSPACE: ideograph-numeric; TEXT-ALIGN: left; mso-pagination: widow-orphan; mso-margin-top-alt: auto; mso-margin-bottom-alt: auto" align=left><SPAN style="FONT-FAMILY: 'Verdana','sans-serif'; ; mso-fareast-font-family: 굴림; mso-bidi-font-family: 굴림; mso-font-kerning: 0pt"><FONT size=2><FONT color=#000000>Step 5. Place the storage bag under fluorescent lights.&nbsp; Within 2-4 weeks,, you can carefully open the bag to see whether the seeds have germinated.</FONT></FONT></SPAN></P>
<P style="MARGIN: 0cm 0cm 0pt; WORD-BREAK: keep-all; TEXT-AUTOSPACE: ideograph-numeric; TEXT-ALIGN: left; mso-pagination: widow-orphan; mso-margin-top-alt: auto; mso-margin-bottom-alt: auto" align=left><SPAN style="FONT-FAMILY: 'Verdana','sans-serif'; ; mso-fareast-font-family: 굴림; mso-bidi-font-family: 굴림; mso-font-kerning: 0pt"><FONT size=2><FONT color=#000000></FONT></FONT></SPAN>&nbsp;</P>
<P style="MARGIN: 0cm 0cm 0pt; WORD-BREAK: keep-all; TEXT-AUTOSPACE: ideograph-numeric; TEXT-ALIGN: left; mso-pagination: widow-orphan; mso-margin-top-alt: auto; mso-margin-bottom-alt: auto" align=left><SPAN style="FONT-FAMILY: 'Verdana','sans-serif'; ; mso-fareast-font-family: 굴림; mso-bidi-font-family: 굴림; mso-font-kerning: 0pt"><FONT size=2><FONT color=#000000></FONT></FONT></SPAN>&nbsp;</P>
<P style="MARGIN: 0cm 0cm 0pt; WORD-BREAK: keep-all; TEXT-AUTOSPACE: ideograph-numeric; TEXT-ALIGN: left; mso-pagination: widow-orphan; mso-margin-top-alt: auto; mso-margin-bottom-alt: auto" align=left><SPAN style="FONT-FAMILY: 'Verdana','sans-serif'; ; mso-fareast-font-family: 굴림; mso-bidi-font-family: 굴림; mso-font-kerning: 0pt"><FONT size=2><FONT color=#000000></FONT></FONT></SPAN>&nbsp;</P>
<P style="MARGIN: 0cm 0cm 0pt; WORD-BREAK: keep-all; TEXT-AUTOSPACE: ideograph-numeric; TEXT-ALIGN: left; mso-pagination: widow-orphan; mso-margin-top-alt: auto; mso-margin-bottom-alt: auto" align=left><SPAN style="FONT-FAMILY: 'Verdana','sans-serif'; ; mso-fareast-font-family: 굴림; mso-bidi-font-family: 굴림; mso-font-kerning: 0pt"><FONT size=2><FONT color=#000000></FONT></FONT></SPAN>&nbsp;</P>
<P style="MARGIN: 0cm 0cm 0pt; WORD-BREAK: keep-all; TEXT-AUTOSPACE: ideograph-numeric; TEXT-ALIGN: left; mso-pagination: widow-orphan; mso-margin-top-alt: auto; mso-margin-bottom-alt: auto" align=left><SPAN style="FONT-FAMILY: 'Verdana','sans-serif'; ; mso-fareast-font-family: 굴림; mso-bidi-font-family: 굴림; mso-font-kerning: 0pt"><FONT size=2><FONT color=#000000></FONT></FONT></SPAN>&nbsp;</P>
<P style="MARGIN: 0cm 0cm 0pt; WORD-BREAK: keep-all; TEXT-AUTOSPACE: ideograph-numeric; TEXT-ALIGN: left; mso-pagination: widow-orphan; mso-margin-top-alt: auto; mso-margin-bottom-alt: auto" align=left><SPAN style="FONT-FAMILY: 'Verdana','sans-serif'; ; mso-fareast-font-family: 굴림; mso-bidi-font-family: 굴림; mso-font-kerning: 0pt"><FONT size=2><FONT color=#000000>Step 6.&nbsp; If the finer roots grow into the tissue, gently pull the tissue away from the newly formed roots.&nbsp; If&nbsp; tissue does not tear easily, spray it with a little water.&nbsp; You will usually end up leaving bits of tissue on the the roots which will decompose in the solve with time.</FONT></FONT></SPAN></P>
<P style="MARGIN: 0cm 0cm 0pt; WORD-BREAK: keep-all; TEXT-AUTOSPACE: ideograph-numeric; TEXT-ALIGN: left; mso-pagination: widow-orphan; mso-margin-top-alt: auto; mso-margin-bottom-alt: auto" align=left><SPAN style="FONT-FAMILY: 'Verdana','sans-serif'; ; mso-fareast-font-family: 굴림; mso-bidi-font-family: 굴림; mso-font-kerning: 0pt"><FONT size=2><FONT color=#000000></FONT></FONT></SPAN>&nbsp;</P>
<P style="MARGIN: 0cm 0cm 0pt; WORD-BREAK: keep-all; TEXT-AUTOSPACE: ideograph-numeric; TEXT-ALIGN: left; mso-pagination: widow-orphan; mso-margin-top-alt: auto; mso-margin-bottom-alt: auto" align=left><SPAN style="FONT-FAMILY: 'Verdana','sans-serif'; ; mso-fareast-font-family: 굴림; mso-bidi-font-family: 굴림; mso-font-kerning: 0pt"><FONT size=2><FONT color=#000000></FONT></FONT></SPAN>&nbsp;</P>
<P style="MARGIN: 0cm 0cm 0pt; WORD-BREAK: keep-all; TEXT-AUTOSPACE: ideograph-numeric; TEXT-ALIGN: left; mso-pagination: widow-orphan; mso-margin-top-alt: auto; mso-margin-bottom-alt: auto" align=left><SPAN style="FONT-FAMILY: 'Verdana','sans-serif'; ; mso-fareast-font-family: 굴림; mso-bidi-font-family: 굴림; mso-font-kerning: 0pt"><FONT size=2><FONT color=#000000></FONT></FONT></SPAN>&nbsp;</P>
<P style="MARGIN: 0cm 0cm 0pt; WORD-BREAK: keep-all; TEXT-AUTOSPACE: ideograph-numeric; TEXT-ALIGN: left; mso-pagination: widow-orphan; mso-margin-top-alt: auto; mso-margin-bottom-alt: auto" align=left><SPAN style="FONT-FAMILY: 'Verdana','sans-serif'; ; mso-fareast-font-family: 굴림; mso-bidi-font-family: 굴림; mso-font-kerning: 0pt"><FONT size=2><FONT color=#000000></FONT></FONT></SPAN>&nbsp;</P>
<P style="MARGIN: 0cm 0cm 0pt; WORD-BREAK: keep-all; TEXT-AUTOSPACE: ideograph-numeric; TEXT-ALIGN: left; mso-pagination: widow-orphan; mso-margin-top-alt: auto; mso-margin-bottom-alt: auto" align=left><SPAN style="FONT-FAMILY: 'Verdana','sans-serif'; ; mso-fareast-font-family: 굴림; mso-bidi-font-family: 굴림; mso-font-kerning: 0pt"><FONT size=2><FONT color=#000000></FONT></FONT></SPAN>&nbsp;</P>
<P style="MARGIN: 0cm 0cm 0pt; WORD-BREAK: keep-all; TEXT-AUTOSPACE: ideograph-numeric; TEXT-ALIGN: left; mso-pagination: widow-orphan; mso-margin-top-alt: auto; mso-margin-bottom-alt: auto" align=left><SPAN style="FONT-FAMILY: 'Verdana','sans-serif'; ; mso-fareast-font-family: 굴림; mso-bidi-font-family: 굴림; mso-font-kerning: 0pt"><FONT size=2><FONT color=#000000></FONT></FONT></SPAN>&nbsp;</P>
<P style="MARGIN: 0cm 0cm 0pt; WORD-BREAK: keep-all; TEXT-AUTOSPACE: ideograph-numeric; TEXT-ALIGN: left; mso-pagination: widow-orphan; mso-margin-top-alt: auto; mso-margin-bottom-alt: auto" align=left><SPAN style="FONT-FAMILY: 'Verdana','sans-serif'; ; mso-fareast-font-family: 굴림; mso-bidi-font-family: 굴림; mso-font-kerning: 0pt"><FONT size=2><FONT color=#000000></FONT></FONT></SPAN>&nbsp;</P>
<P style="MARGIN: 0cm 0cm 0pt; WORD-BREAK: keep-all; TEXT-AUTOSPACE: ideograph-numeric; TEXT-ALIGN: left; mso-pagination: widow-orphan; mso-margin-top-alt: auto; mso-margin-bottom-alt: auto" align=left><SPAN style="FONT-FAMILY: 'Verdana','sans-serif'; ; mso-fareast-font-family: 굴림; mso-bidi-font-family: 굴림; mso-font-kerning: 0pt"><FONT size=2><FONT color=#000000></FONT></FONT></SPAN>&nbsp;</P>
<P style="MARGIN: 0cm 0cm 0pt; WORD-BREAK: keep-all; TEXT-AUTOSPACE: ideograph-numeric; TEXT-ALIGN: left; mso-pagination: widow-orphan; mso-margin-top-alt: auto; mso-margin-bottom-alt: auto" align=left><SPAN style="FONT-FAMILY: 'Verdana','sans-serif'; ; mso-fareast-font-family: 굴림; mso-bidi-font-family: 굴림; mso-font-kerning: 0pt"><FONT size=2><FONT color=#000000></FONT></FONT></SPAN>&nbsp;</P>
<P style="MARGIN: 0cm 0cm 0pt; WORD-BREAK: keep-all; TEXT-AUTOSPACE: ideograph-numeric; TEXT-ALIGN: left; mso-pagination: widow-orphan; mso-margin-top-alt: auto; mso-margin-bottom-alt: auto" align=left><SPAN style="FONT-FAMILY: 'Verdana','sans-serif'; ; mso-fareast-font-family: 굴림; mso-bidi-font-family: 굴림; mso-font-kerning: 0pt"><FONT size=2><FONT color=#000000></FONT></FONT></SPAN>&nbsp;</P>
<P style="MARGIN: 0cm 0cm 0pt; WORD-BREAK: keep-all; TEXT-AUTOSPACE: ideograph-numeric; TEXT-ALIGN: left; mso-pagination: widow-orphan; mso-margin-top-alt: auto; mso-margin-bottom-alt: auto" align=left><SPAN style="FONT-FAMILY: 'Verdana','sans-serif'; ; mso-fareast-font-family: 굴림; mso-bidi-font-family: 굴림; mso-font-kerning: 0pt"><FONT size=2><FONT color=#000000></FONT></FONT></SPAN>&nbsp;</P>
<P style="MARGIN: 0cm 0cm 0pt; WORD-BREAK: keep-all; TEXT-AUTOSPACE: ideograph-numeric; TEXT-ALIGN: left; mso-pagination: widow-orphan; mso-margin-top-alt: auto; mso-margin-bottom-alt: auto" align=left><SPAN style="FONT-FAMILY: 'Verdana','sans-serif'; ; mso-fareast-font-family: 굴림; mso-bidi-font-family: 굴림; mso-font-kerning: 0pt"><FONT size=2><FONT color=#000000>Step 7.&nbsp; Plant the seedlings with the top portion of the newly formed bulblet (see picture with pencil pointing to bulblet) just above the surface of a moist mixture of peat, vermiculite and perlite or a well draining soiless potting mix.&nbsp; You may have to gently press down on the roots to make them point downward into the soil</FONT></FONT></SPAN></P>
<P style="MARGIN: 0cm 0cm 0pt; WORD-BREAK: keep-all; TEXT-AUTOSPACE: ideograph-numeric; TEXT-ALIGN: left; mso-pagination: widow-orphan; mso-margin-top-alt: auto; mso-margin-bottom-alt: auto" align=left><SPAN style="FONT-FAMILY: 'Verdana','sans-serif'; ; mso-fareast-font-family: 굴림; mso-bidi-font-family: 굴림; mso-font-kerning: 0pt"></SPAN>&nbsp;</P>
<P style="MARGIN: 0cm 0cm 0pt; WORD-BREAK: keep-all; TEXT-AUTOSPACE: ideograph-numeric; TEXT-ALIGN: left; mso-pagination: widow-orphan; mso-margin-top-alt: auto; mso-margin-bottom-alt: auto" align=left><SPAN style="FONT-FAMILY: 'Verdana','sans-serif'; ; mso-fareast-font-family: 굴림; mso-bidi-font-family: 굴림; mso-font-kerning: 0pt"></SPAN>&nbsp;</P>
<P style="MARGIN: 0cm 0cm 0pt; WORD-BREAK: keep-all; TEXT-AUTOSPACE: ideograph-numeric; TEXT-ALIGN: left; mso-pagination: widow-orphan; mso-margin-top-alt: auto; mso-margin-bottom-alt: auto" align=left><SPAN style="FONT-FAMILY: 'Verdana','sans-serif'; ; mso-fareast-font-family: 굴림; mso-bidi-font-family: 굴림; mso-font-kerning: 0pt"></SPAN>&nbsp;</P>
<P style="MARGIN: 0cm 0cm 0pt; WORD-BREAK: keep-all; TEXT-AUTOSPACE: ideograph-numeric; TEXT-ALIGN: left; mso-pagination: widow-orphan; mso-margin-top-alt: auto; mso-margin-bottom-alt: auto" align=left><SPAN style="FONT-FAMILY: 'Verdana','sans-serif'; ; mso-fareast-font-family: 굴림; mso-bidi-font-family: 굴림; mso-font-kerning: 0pt"></SPAN>&nbsp;</P>
<P style="MARGIN: 0cm 0cm 0pt; WORD-BREAK: keep-all; TEXT-AUTOSPACE: ideograph-numeric; TEXT-ALIGN: left; mso-pagination: widow-orphan; mso-margin-top-alt: auto; mso-margin-bottom-alt: auto" align=left><SPAN style="FONT-FAMILY: 'Verdana','sans-serif'; ; mso-fareast-font-family: 굴림; mso-bidi-font-family: 굴림; mso-font-kerning: 0pt"></SPAN><SPAN style="FONT-FAMILY: 'Verdana','sans-serif'; ; mso-fareast-font-family: 굴림; mso-bidi-font-family: 굴림; mso-font-kerning: 0pt"><FONT size=2><FONT color=#000000></FONT></FONT></SPAN>&nbsp;</P>
<P style="MARGIN: 0cm 0cm 0pt; WORD-BREAK: keep-all; TEXT-AUTOSPACE: ideograph-numeric; TEXT-ALIGN: left; mso-pagination: widow-orphan; mso-margin-top-alt: auto; mso-margin-bottom-alt: auto" align=left><SPAN style="FONT-FAMILY: 'Verdana','sans-serif'; ; mso-fareast-font-family: 굴림; mso-bidi-font-family: 굴림; mso-font-kerning: 0pt"><FONT size=2><FONT color=#000000></FONT></FONT></SPAN>&nbsp;</P>
<P style="MARGIN: 0cm 0cm 0pt; WORD-BREAK: keep-all; TEXT-AUTOSPACE: ideograph-numeric; TEXT-ALIGN: left; mso-pagination: widow-orphan; mso-margin-top-alt: auto; mso-margin-bottom-alt: auto" align=left><SPAN style="FONT-FAMILY: 'Verdana','sans-serif'; ; mso-fareast-font-family: 굴림; mso-bidi-font-family: 굴림; mso-font-kerning: 0pt"><FONT size=2><FONT color=#000000></FONT></FONT></SPAN>&nbsp;</P>
<P style="MARGIN: 0cm 0cm 0pt; WORD-BREAK: keep-all; TEXT-AUTOSPACE: ideograph-numeric; TEXT-ALIGN: left; mso-pagination: widow-orphan; mso-margin-top-alt: auto; mso-margin-bottom-alt: auto" align=left><SPAN style="FONT-FAMILY: 'Verdana','sans-serif'; ; mso-fareast-font-family: 굴림; mso-bidi-font-family: 굴림; mso-font-kerning: 0pt"><FONT size=2><FONT color=#000000></FONT></FONT></SPAN>&nbsp;</P>
<P style="MARGIN: 0cm 0cm 0pt; WORD-BREAK: keep-all; TEXT-AUTOSPACE: ideograph-numeric; TEXT-ALIGN: left; mso-pagination: widow-orphan; mso-margin-top-alt: auto; mso-margin-bottom-alt: auto" align=left><SPAN style="FONT-FAMILY: 'Verdana','sans-serif'; ; mso-fareast-font-family: 굴림; mso-bidi-font-family: 굴림; mso-font-kerning: 0pt"><FONT size=2><FONT color=#000000></FONT></FONT></SPAN>&nbsp;</P>
<P style="MARGIN: 0cm 0cm 0pt; WORD-BREAK: keep-all; TEXT-AUTOSPACE: ideograph-numeric; TEXT-ALIGN: left; mso-pagination: widow-orphan; mso-margin-top-alt: auto; mso-margin-bottom-alt: auto" align=left><SPAN style="FONT-FAMILY: 'Verdana','sans-serif'; ; mso-fareast-font-family: 굴림; mso-bidi-font-family: 굴림; mso-font-kerning: 0pt"><FONT size=2><FONT color=#000000></FONT></FONT></SPAN>&nbsp;</P>
<P style="MARGIN: 0cm 0cm 0pt; WORD-BREAK: keep-all; TEXT-AUTOSPACE: ideograph-numeric; TEXT-ALIGN: left; mso-pagination: widow-orphan; mso-margin-top-alt: auto; mso-margin-bottom-alt: auto" align=left><SPAN style="FONT-FAMILY: 'Verdana','sans-serif'; ; mso-fareast-font-family: 굴림; mso-bidi-font-family: 굴림; mso-font-kerning: 0pt"><FONT size=2><FONT color=#000000></FONT></FONT></SPAN>&nbsp;</P>
<P style="MARGIN: 0cm 0cm 0pt; WORD-BREAK: keep-all; TEXT-AUTOSPACE: ideograph-numeric; TEXT-ALIGN: left; mso-pagination: widow-orphan; mso-margin-top-alt: auto; mso-margin-bottom-alt: auto" align=left><SPAN style="FONT-FAMILY: 'Verdana','sans-serif'; ; mso-fareast-font-family: 굴림; mso-bidi-font-family: 굴림; mso-font-kerning: 0pt"><FONT size=2><FONT color=#000000></FONT></FONT></SPAN>&nbsp;</P>
<P style="MARGIN: 0cm 0cm 0pt; WORD-BREAK: keep-all; TEXT-AUTOSPACE: ideograph-numeric; TEXT-ALIGN: left; mso-pagination: widow-orphan; mso-margin-top-alt: auto; mso-margin-bottom-alt: auto" align=left><SPAN style="FONT-FAMILY: 'Verdana','sans-serif'; ; mso-fareast-font-family: 굴림; mso-bidi-font-family: 굴림; mso-font-kerning: 0pt"><FONT size=2><FONT color=#000000>Step 8.&nbsp; Provide the seedlings with some light, keep the potting media moist, but not too wet, and do not allow it to dry out completely until the seedlings are well established.</FONT></FONT></SPAN></P>
<P style="MARGIN: 0cm 0cm 0pt; WORD-BREAK: keep-all; TEXT-AUTOSPACE: ideograph-numeric; TEXT-ALIGN: left; mso-pagination: widow-orphan; mso-margin-top-alt: auto; mso-margin-bottom-alt: auto" align=left><SPAN style="FONT-FAMILY: 'Verdana','sans-serif'; ; mso-fareast-font-family: 굴림; mso-bidi-font-family: 굴림; mso-font-kerning: 0pt"><FONT size=2><FONT color=#000000>Care for your seedlings just as you do the parent bulb.&nbsp; It will take 3-5 years for your seedlings to flower.</FONT></FONT></SPAN></P>
<P style="MARGIN: 0cm 0cm 0pt; WORD-BREAK: keep-all; TEXT-AUTOSPACE: ideograph-numeric; TEXT-ALIGN: left; mso-pagination: widow-orphan; mso-margin-top-alt: auto; mso-margin-bottom-alt: auto" align=left><SPAN style="FONT-FAMILY: 'Verdana','sans-serif'; ; mso-fareast-font-family: 굴림; mso-bidi-font-family: 굴림; mso-font-kerning: 0pt"><FONT size=2><FONT color=#000000></FONT></FONT></SPAN>&nbsp;</P>
<P style="MARGIN: 0cm 0cm 0pt; WORD-BREAK: keep-all; TEXT-AUTOSPACE: ideograph-numeric; TEXT-ALIGN: left; mso-pagination: widow-orphan; mso-margin-top-alt: auto; mso-margin-bottom-alt: auto" align=left><SPAN style="FONT-FAMILY: 'Verdana','sans-serif'; ; mso-fareast-font-family: 굴림; mso-bidi-font-family: 굴림; mso-font-kerning: 0pt"><FONT size=2><FONT color=#000000></FONT></FONT></SPAN>&nbsp;</P>
<P style="MARGIN: 0cm 0cm 0pt; WORD-BREAK: keep-all; TEXT-AUTOSPACE: ideograph-numeric; TEXT-ALIGN: left; mso-pagination: widow-orphan; mso-margin-top-alt: auto; mso-margin-bottom-alt: auto" align=left><SPAN style="FONT-FAMILY: 'Verdana','sans-serif'; ; mso-fareast-font-family: 굴림; mso-bidi-font-family: 굴림; mso-font-kerning: 0pt"><FONT size=2><FONT color=#000000></FONT></FONT></SPAN>&nbsp;</P>
<P style="MARGIN: 0cm 0cm 0pt; WORD-BREAK: keep-all; TEXT-AUTOSPACE: ideograph-numeric; TEXT-ALIGN: left; mso-pagination: widow-orphan; mso-margin-top-alt: auto; mso-margin-bottom-alt: auto" align=left><SPAN style="FONT-FAMILY: 'Verdana','sans-serif'; ; mso-fareast-font-family: 굴림; mso-bidi-font-family: 굴림; mso-font-kerning: 0pt"><FONT size=2><FONT color=#000000></FONT></FONT></SPAN>&nbsp;</P>
<P style="MARGIN: 0cm 0cm 0pt; WORD-BREAK: keep-all; TEXT-AUTOSPACE: ideograph-numeric; TEXT-ALIGN: left; mso-pagination: widow-orphan; mso-margin-top-alt: auto; mso-margin-bottom-alt: auto" align=left><SPAN style="FONT-FAMILY: 'Verdana','sans-serif'; ; mso-fareast-font-family: 굴림; mso-bidi-font-family: 굴림; mso-font-kerning: 0pt"><FONT size=2><FONT color=#000000></FONT></FONT></SPAN>&nbsp;</P>
<P style="MARGIN: 0cm 0cm 0pt; WORD-BREAK: keep-all; TEXT-AUTOSPACE: ideograph-numeric; TEXT-ALIGN: left; mso-pagination: widow-orphan; mso-margin-top-alt: auto; mso-margin-bottom-alt: auto" align=left><SPAN style="FONT-FAMILY: 'Verdana','sans-serif'; ; mso-fareast-font-family: 굴림; mso-bidi-font-family: 굴림; mso-font-kerning: 0pt"><FONT size=2><FONT color=#000000></FONT></FONT></SPAN>&nbsp;</P>
<P style="MARGIN: 0cm 0cm 0pt; WORD-BREAK: keep-all; TEXT-AUTOSPACE: ideograph-numeric; TEXT-ALIGN: left; mso-pagination: widow-orphan; mso-margin-top-alt: auto; mso-margin-bottom-alt: auto" align=left><SPAN style="FONT-FAMILY: 'Verdana','sans-serif'; ; mso-fareast-font-family: 굴림; mso-bidi-font-family: 굴림; mso-font-kerning: 0pt"><FONT size=2><FONT color=#000000></FONT></FONT></SPAN>&nbsp;</P>
<P style="MARGIN: 0cm 0cm 0pt; WORD-BREAK: keep-all; TEXT-AUTOSPACE: ideograph-numeric; TEXT-ALIGN: left; mso-pagination: widow-orphan; mso-margin-top-alt: auto; mso-margin-bottom-alt: auto" align=left><SPAN style="FONT-FAMILY: 'Verdana','sans-serif'; ; mso-fareast-font-family: 굴림; mso-bidi-font-family: 굴림; mso-font-kerning: 0pt"><FONT size=2><FONT color=#000000>아랫글 석짜님 floating method를 보고 참고가 될만하여 올립니다.</FONT></FONT></SPAN></P>
<P style="MARGIN: 0cm 0cm 0pt; WORD-BREAK: keep-all; TEXT-AUTOSPACE: ideograph-numeric; TEXT-ALIGN: left; mso-pagination: widow-orphan; mso-margin-top-alt: auto; mso-margin-bottom-alt: auto" align=left><SPAN style="FONT-FAMILY: 'Verdana','sans-serif'; ; mso-fareast-font-family: 굴림; mso-bidi-font-family: 굴림; mso-font-kerning: 0pt"><FONT color=#000000 size=2>올해는 저도 이 방법을 활용하려합니다.</FONT></SPAN></P>
<P style="MARGIN: 0cm 0cm 0pt; WORD-BREAK: keep-all; TEXT-AUTOSPACE: ideograph-numeric; TEXT-ALIGN: left; mso-pagination: widow-orphan; mso-margin-top-alt: auto; mso-margin-bottom-alt: auto" align=left><SPAN style="FONT-FAMILY: 'Verdana','sans-serif'; ; mso-fareast-font-family: 굴림; mso-bidi-font-family: 굴림; mso-font-kerning: 0pt"><FONT color=#000000 size=2>시간이 없어서 번역은 못하였고, 그림만봐도 알 수 있을듯합니다.</FONT></SPAN></P></TD>
<TD style="BORDER-RIGHT: #ebebeb; PADDING-RIGHT: 0cm; BORDER-TOP: #ebebeb; PADDING-LEFT: 0cm; PADDING-BOTTOM: 0cm; BORDER-LEFT: #ebebeb; WIDTH: 22.5pt; PADDING-TOP: 0cm; BORDER-BOTTOM: #ebebeb; HEIGHT: 11.25pt; BACKGROUND-COLOR: transparent" vAlign=top width=30 rowSpan=8>
<P style="MARGIN: 0cm 0cm 0pt; WORD-BREAK: keep-all; TEXT-AUTOSPACE: ideograph-numeric; TEXT-ALIGN: left; mso-pagination: widow-orphan" align=left><SPAN style="FONT-SIZE: 12pt; FONT-FAMILY: 굴림; mso-bidi-font-family: 굴림; mso-font-kerning: 0pt"><FONT color=#000000>&nbsp;</FONT></SPAN></P></TD>
<TD style="BORDER-RIGHT: #ebebeb; PADDING-RIGHT: 0cm; BORDER-TOP: #ebebeb; PADDING-LEFT: 0cm; PADDING-BOTTOM: 0cm; BORDER-LEFT: #ebebeb; WIDTH: 121.5pt; PADDING-TOP: 0cm; BORDER-BOTTOM: #ebebeb; HEIGHT: 11.25pt; BACKGROUND-COLOR: transparent" vAlign=top width=162>
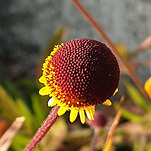
<P style="MARGIN: 0cm 0cm 0pt; WORD-BREAK: keep-all; TEXT-AUTOSPACE: ideograph-numeric; TEXT-ALIGN: left; mso-pagination: widow-orphan" align=left><SPAN style="FONT-SIZE: 12pt; FONT-FAMILY: 굴림; mso-bidi-font-family: 굴림; mso-font-kerning: 0pt"><FONT color=#000000>Amaryllis Flower </FONT></SPAN></P>
<P style="MARGIN: 0cm 0cm 0pt; WORD-BREAK: keep-all; TEXT-AUTOSPACE: ideograph-numeric; TEXT-ALIGN: left; mso-pagination: widow-orphan; mso-margin-top-alt: auto; mso-margin-bottom-alt: auto; mso-line-height-alt: 11.25pt" align=left><SPAN style="FONT-SIZE: 12pt; FONT-FAMILY: 굴림; mso-bidi-font-family: 굴림; mso-font-kerning: 0pt"><v:shapetype id=_x0000_t75 stroked="f" filled="f" path="m@4@5l@4@11@9@11@9@5xe" o:preferrelative="t" o:spt="75" coordsize="21600,21600"><v:stroke joinstyle="miter"></v:stroke><v:formulas><v:f eqn="if lineDrawn pixelLineWidth 0"></v:f><v:f eqn="sum @0 1 0"></v:f><v:f eqn="sum 0 0 @1"></v:f><v:f eqn="prod @2 1 2"></v:f><v:f eqn="prod @3 21600 pixelWidth"></v:f><v:f eqn="prod @3 21600 pixelHeight"></v:f><v:f eqn="sum @0 0 1"></v:f><v:f eqn="prod @6 1 2"></v:f><v:f eqn="prod @7 21600 pixelWidth"></v:f><v:f eqn="sum @8 21600 0"></v:f><v:f eqn="prod @7 21600 pixelHeight"></v:f><v:f eqn="sum @10 21600 0"></v:f></v:formulas><v:path o:connecttype="rect" gradientshapeok="t" o:extrusionok="f"></v:path><o:lock aspectratio="t" v:ext="edit"></o:lock></v:shapetype><v:shape id=_x0000_i1025 style="WIDTH: 135.75pt; HEIGHT: 103.5pt" alt="" type="#_x0000_t75"><v:imagedata o:href="http://www.landspro.com/pinkamar.JPG" src="file:///C:\DOCUME~1\MYHOME\LOCALS~1\Temp\msohtmlclip1\01\clip_image001.jpg"><FONT color=#000000><img src="https://t1.daumcdn.net/cfile/cafe/196C4E524D4F7A8C1A" class="txc-image" style="CLEAR: none; FLOAT: none" actualwidth="320" hspace="1" width="320" vspace="1" border="0" id="A_196C4E524D4F7A8C1A6780"/></FONT></v:imagedata></v:shape></SPAN></P></TD></TR>
<TR style="HEIGHT: 15.75pt; mso-yfti-irow: 1">
<TD style="BORDER-RIGHT: #ebebeb; PADDING-RIGHT: 0cm; BORDER-TOP: #ebebeb; PADDING-LEFT: 0cm; PADDING-BOTTOM: 0cm; BORDER-LEFT: #ebebeb; WIDTH: 121.5pt; PADDING-TOP: 0cm; BORDER-BOTTOM: #ebebeb; HEIGHT: 15.75pt; BACKGROUND-COLOR: transparent" vAlign=top width=162>
<P style="MARGIN: 0cm 0cm 0pt; WORD-BREAK: keep-all; TEXT-AUTOSPACE: ideograph-numeric; TEXT-ALIGN: left; mso-pagination: widow-orphan" align=left><SPAN style="FONT-SIZE: 12pt; FONT-FAMILY: 굴림; mso-bidi-font-family: 굴림; mso-font-kerning: 0pt"><FONT color=#000000>Amaryllis Seeds on Tissue </FONT></SPAN></P>
<P style="MARGIN: 0cm 0cm 0pt; WORD-BREAK: keep-all; TEXT-AUTOSPACE: ideograph-numeric; TEXT-ALIGN: center; mso-pagination: widow-orphan" align=left><img src="https://t1.daumcdn.net/cfile/cafe/1835A8544D4F7AC11D" class="txc-image" style="CLEAR: none; FLOAT: none" actualwidth="320" hspace="1" width="320" vspace="1" border="0" id="A_1835A8544D4F7AC11DB13F"/></P>
<P style="MARGIN: 0cm 0cm 0pt; WORD-BREAK: keep-all; TEXT-AUTOSPACE: ideograph-numeric; TEXT-ALIGN: left; mso-pagination: widow-orphan" align=left><SPAN style="FONT-SIZE: 12pt; FONT-FAMILY: 굴림; mso-bidi-font-family: 굴림; mso-font-kerning: 0pt"><FONT color=#000000></FONT></SPAN></P>
<P style="MARGIN: 0cm 0cm 0pt; WORD-BREAK: keep-all; TEXT-AUTOSPACE: ideograph-numeric; TEXT-ALIGN: left; mso-pagination: widow-orphan; mso-margin-top-alt: auto; mso-margin-bottom-alt: auto" align=left><SPAN style="FONT-SIZE: 12pt; FONT-FAMILY: 굴림; mso-bidi-font-family: 굴림; mso-font-kerning: 0pt"><v:shape id=_x0000_i1026 style="WIDTH: 137.25pt; HEIGHT: 100.5pt" alt="" type="#_x0000_t75"><v:imagedata o:href="http://www.landspro.com/amaryllis_1.JPG" src="file:///C:\DOCUME~1\MYHOME\LOCALS~1\Temp\msohtmlclip1\01\clip_image003.jpg"><FONT color=#000000></FONT></v:imagedata></v:shape></SPAN></P>
<P style="MARGIN: 0cm 0cm 0pt; WORD-BREAK: keep-all; TEXT-AUTOSPACE: ideograph-numeric; TEXT-ALIGN: left; mso-pagination: widow-orphan; mso-margin-top-alt: auto; mso-margin-bottom-alt: auto" align=left><SPAN style="FONT-SIZE: 12pt; FONT-FAMILY: 굴림; mso-bidi-font-family: 굴림; mso-font-kerning: 0pt"><FONT color=#000000>&nbsp;</FONT></SPAN></P></TD></TR>
<TR style="HEIGHT: 15pt; mso-yfti-irow: 2">
<TD style="BORDER-RIGHT: #ebebeb; PADDING-RIGHT: 0cm; BORDER-TOP: #ebebeb; PADDING-LEFT: 0cm; PADDING-BOTTOM: 0cm; BORDER-LEFT: #ebebeb; WIDTH: 121.5pt; PADDING-TOP: 0cm; BORDER-BOTTOM: #ebebeb; HEIGHT: 15pt; BACKGROUND-COLOR: transparent" vAlign=top width=162>
<P style="MARGIN: 0cm 0cm 0pt; WORD-BREAK: keep-all; TEXT-AUTOSPACE: ideograph-numeric; TEXT-ALIGN: left; mso-pagination: widow-orphan" align=left><SPAN style="FONT-SIZE: 12pt; FONT-FAMILY: 굴림; mso-bidi-font-family: 굴림; mso-font-kerning: 0pt"><FONT color=#000000>Folded Tissue</FONT></SPAN></P>
<P style="MARGIN: 0cm 0cm 0pt; WORD-BREAK: keep-all; TEXT-AUTOSPACE: ideograph-numeric; TEXT-ALIGN: center; mso-pagination: widow-orphan" align=left><img src="https://t1.daumcdn.net/cfile/cafe/123E35534D4F7AE21F" class="txc-image" style="CLEAR: none; FLOAT: none" actualwidth="320" hspace="1" width="320" vspace="1" border="0" id="A_123E35534D4F7AE21F0AAA"/></P>
<P style="MARGIN: 0cm 0cm 0pt; WORD-BREAK: keep-all; TEXT-AUTOSPACE: ideograph-numeric; TEXT-ALIGN: left; mso-pagination: widow-orphan" align=left><SPAN style="FONT-SIZE: 12pt; FONT-FAMILY: 굴림; mso-bidi-font-family: 굴림; mso-font-kerning: 0pt"><FONT color=#000000> </FONT></SPAN></P>
<P style="MARGIN: 0cm 0cm 0pt; WORD-BREAK: keep-all; TEXT-AUTOSPACE: ideograph-numeric; TEXT-ALIGN: left; mso-pagination: widow-orphan; mso-margin-top-alt: auto; mso-margin-bottom-alt: auto" align=left><SPAN style="FONT-SIZE: 12pt; FONT-FAMILY: 굴림; mso-bidi-font-family: 굴림; mso-font-kerning: 0pt"><v:shape id=_x0000_i1027 style="WIDTH: 138pt; HEIGHT: 101.25pt" alt="" type="#_x0000_t75"><v:imagedata o:href="http://www.landspro.com/amaryllis_2.JPG" src="file:///C:\DOCUME~1\MYHOME\LOCALS~1\Temp\msohtmlclip1\01\clip_image005.jpg"><FONT color=#000000></FONT></v:imagedata></v:shape></SPAN></P></TD></TR>
<TR style="HEIGHT: 15pt; mso-yfti-irow: 3">
<TD style="BORDER-RIGHT: #ebebeb; PADDING-RIGHT: 0cm; BORDER-TOP: #ebebeb; PADDING-LEFT: 0cm; PADDING-BOTTOM: 0cm; BORDER-LEFT: #ebebeb; WIDTH: 121.5pt; PADDING-TOP: 0cm; BORDER-BOTTOM: #ebebeb; HEIGHT: 15pt; BACKGROUND-COLOR: transparent" vAlign=top width=162>
<P style="MARGIN: 0cm 0cm 0pt; WORD-BREAK: keep-all; TEXT-AUTOSPACE: ideograph-numeric; TEXT-ALIGN: left; mso-pagination: widow-orphan" align=left><SPAN style="FONT-SIZE: 12pt; FONT-FAMILY: 굴림; mso-bidi-font-family: 굴림; mso-font-kerning: 0pt"><FONT color=#000000>Folded Tissue in Bag </FONT></SPAN></P>
<P style="MARGIN: 0cm 0cm 0pt; WORD-BREAK: keep-all; TEXT-AUTOSPACE: ideograph-numeric; TEXT-ALIGN: center; mso-pagination: widow-orphan" align=left><img src="https://t1.daumcdn.net/cfile/cafe/114AC7574D4F7AF81F" class="txc-image" style="CLEAR: none; FLOAT: none" actualwidth="320" hspace="1" width="320" vspace="1" border="0" id="A_114AC7574D4F7AF81F2CB4"/></P>
<P style="MARGIN: 0cm 0cm 0pt; WORD-BREAK: keep-all; TEXT-AUTOSPACE: ideograph-numeric; TEXT-ALIGN: left; mso-pagination: widow-orphan" align=left><SPAN style="FONT-SIZE: 12pt; FONT-FAMILY: 굴림; mso-bidi-font-family: 굴림; mso-font-kerning: 0pt"><FONT color=#000000></FONT></SPAN></P>
<P style="MARGIN: 0cm 0cm 0pt; WORD-BREAK: keep-all; TEXT-AUTOSPACE: ideograph-numeric; TEXT-ALIGN: left; mso-pagination: widow-orphan; mso-margin-top-alt: auto; mso-margin-bottom-alt: auto" align=left><SPAN style="FONT-SIZE: 12pt; FONT-FAMILY: 굴림; mso-bidi-font-family: 굴림; mso-font-kerning: 0pt"><v:shape id=_x0000_i1028 style="WIDTH: 137.25pt; HEIGHT: 103.5pt" alt="" type="#_x0000_t75"><v:imagedata o:href="http://www.landspro.com/amaryllis_3.JPG" src="file:///C:\DOCUME~1\MYHOME\LOCALS~1\Temp\msohtmlclip1\01\clip_image007.jpg"><FONT color=#000000></FONT></v:imagedata></v:shape></SPAN></P></TD></TR>
<TR style="HEIGHT: 15pt; mso-yfti-irow: 4">
<TD style="BORDER-RIGHT: #ebebeb; PADDING-RIGHT: 0cm; BORDER-TOP: #ebebeb; PADDING-LEFT: 0cm; PADDING-BOTTOM: 0cm; BORDER-LEFT: #ebebeb; WIDTH: 121.5pt; PADDING-TOP: 0cm; BORDER-BOTTOM: #ebebeb; HEIGHT: 15pt; BACKGROUND-COLOR: transparent" vAlign=top width=162>
<P style="MARGIN: 0cm 0cm 0pt; WORD-BREAK: keep-all; TEXT-AUTOSPACE: ideograph-numeric; TEXT-ALIGN: left; mso-pagination: widow-orphan" align=left><SPAN style="FONT-SIZE: 12pt; FONT-FAMILY: 굴림; mso-bidi-font-family: 굴림; mso-font-kerning: 0pt"><FONT color=#000000>Amaryllis Seedlings </FONT></SPAN></P>
<P style="MARGIN: 0cm 0cm 0pt; WORD-BREAK: keep-all; TEXT-AUTOSPACE: ideograph-numeric; TEXT-ALIGN: center; mso-pagination: widow-orphan" align=left><img src="https://t1.daumcdn.net/cfile/cafe/13609F594D4F7B1619" class="txc-image" style="CLEAR: none; FLOAT: none" actualwidth="320" hspace="1" width="320" vspace="1" border="0" id="A_13609F594D4F7B16198514"/></P>
<P style="MARGIN: 0cm 0cm 0pt; WORD-BREAK: keep-all; TEXT-AUTOSPACE: ideograph-numeric; TEXT-ALIGN: left; mso-pagination: widow-orphan" align=left><SPAN style="FONT-SIZE: 12pt; FONT-FAMILY: 굴림; mso-bidi-font-family: 굴림; mso-font-kerning: 0pt"><FONT color=#000000></FONT></SPAN></P>
<P style="MARGIN: 0cm 0cm 0pt; WORD-BREAK: keep-all; TEXT-AUTOSPACE: ideograph-numeric; TEXT-ALIGN: left; mso-pagination: widow-orphan; mso-margin-top-alt: auto; mso-margin-bottom-alt: auto" align=left><SPAN style="FONT-SIZE: 12pt; FONT-FAMILY: 굴림; mso-bidi-font-family: 굴림; mso-font-kerning: 0pt"><v:shape id=_x0000_i1029 style="WIDTH: 138pt; HEIGHT: 100.5pt" alt="" type="#_x0000_t75"><v:imagedata o:href="http://www.landspro.com/amaryllis_3a.JPG" src="file:///C:\DOCUME~1\MYHOME\LOCALS~1\Temp\msohtmlclip1\01\clip_image009.jpg"><FONT color=#000000></FONT></v:imagedata></v:shape></SPAN></P></TD></TR>
<TR style="HEIGHT: 15pt; mso-yfti-irow: 5">
<TD style="BORDER-RIGHT: #ebebeb; PADDING-RIGHT: 0cm; BORDER-TOP: #ebebeb; PADDING-LEFT: 0cm; PADDING-BOTTOM: 0cm; BORDER-LEFT: #ebebeb; WIDTH: 121.5pt; PADDING-TOP: 0cm; BORDER-BOTTOM: #ebebeb; HEIGHT: 15pt; BACKGROUND-COLOR: transparent" vAlign=top width=162>
<P style="MARGIN: 0cm 0cm 0pt; WORD-BREAK: keep-all; TEXT-AUTOSPACE: ideograph-numeric; TEXT-ALIGN: left; mso-pagination: widow-orphan" align=left><SPAN style="FONT-SIZE: 12pt; FONT-FAMILY: 굴림; mso-bidi-font-family: 굴림; mso-font-kerning: 0pt"><FONT color=#000000>Bulblets </FONT></SPAN></P>
<P style="MARGIN: 0cm 0cm 0pt; WORD-BREAK: keep-all; TEXT-AUTOSPACE: ideograph-numeric; TEXT-ALIGN: center; mso-pagination: widow-orphan" align=left><img src="https://t1.daumcdn.net/cfile/cafe/1833E35A4D4F7B3F25" class="txc-image" style="CLEAR: none; FLOAT: none" actualwidth="320" hspace="1" width="320" vspace="1" border="0" id="A_1833E35A4D4F7B3F251D91"/></P>
<P style="MARGIN: 0cm 0cm 0pt; WORD-BREAK: keep-all; TEXT-AUTOSPACE: ideograph-numeric; TEXT-ALIGN: left; mso-pagination: widow-orphan" align=left><SPAN style="FONT-SIZE: 12pt; FONT-FAMILY: 굴림; mso-bidi-font-family: 굴림; mso-font-kerning: 0pt"><FONT color=#000000></FONT></SPAN></P>
<P style="MARGIN: 0cm 0cm 0pt; WORD-BREAK: keep-all; TEXT-AUTOSPACE: ideograph-numeric; TEXT-ALIGN: left; mso-pagination: widow-orphan; mso-margin-top-alt: auto; mso-margin-bottom-alt: auto" align=left><SPAN style="FONT-SIZE: 12pt; FONT-FAMILY: 굴림; mso-bidi-font-family: 굴림; mso-font-kerning: 0pt"><v:shape id=_x0000_i1030 style="WIDTH: 139.5pt; HEIGHT: 107.25pt" alt="" type="#_x0000_t75"><v:imagedata o:href="http://www.landspro.com/amaryllis_4.JPG" src="file:///C:\DOCUME~1\MYHOME\LOCALS~1\Temp\msohtmlclip1\01\clip_image011.jpg"><FONT color=#000000></FONT></v:imagedata></v:shape></SPAN></P>
<P style="MARGIN: 0cm 0cm 0pt; WORD-BREAK: keep-all; TEXT-AUTOSPACE: ideograph-numeric; TEXT-ALIGN: left; mso-pagination: widow-orphan; mso-margin-top-alt: auto; mso-margin-bottom-alt: auto" align=left><SPAN style="FONT-SIZE: 12pt; FONT-FAMILY: 굴림; mso-bidi-font-family: 굴림; mso-font-kerning: 0pt"><FONT color=#000000>&nbsp;</FONT></SPAN></P></TD></TR>
<TR style="HEIGHT: 15pt; mso-yfti-irow: 6">
<TD style="BORDER-RIGHT: #ebebeb; PADDING-RIGHT: 0cm; BORDER-TOP: #ebebeb; PADDING-LEFT: 0cm; PADDING-BOTTOM: 0cm; BORDER-LEFT: #ebebeb; WIDTH: 121.5pt; PADDING-TOP: 0cm; BORDER-BOTTOM: #ebebeb; HEIGHT: 15pt; BACKGROUND-COLOR: transparent" vAlign=top width=162>
<P style="MARGIN: 0cm 0cm 0pt; WORD-BREAK: keep-all; TEXT-AUTOSPACE: ideograph-numeric; TEXT-ALIGN: left; mso-pagination: widow-orphan" align=left><SPAN style="FONT-SIZE: 12pt; FONT-FAMILY: 굴림; mso-bidi-font-family: 굴림; mso-font-kerning: 0pt"><FONT color=#000000>Seedlings in Tray Cells </FONT></SPAN></P>
<P style="MARGIN: 0cm 0cm 0pt; WORD-BREAK: keep-all; TEXT-AUTOSPACE: ideograph-numeric; TEXT-ALIGN: center; mso-pagination: widow-orphan" align=left><img src="https://t1.daumcdn.net/cfile/cafe/1435A55A4D4F7B511E" class="txc-image" style="CLEAR: none; FLOAT: none" actualwidth="320" hspace="1" width="320" vspace="1" border="0" id="A_1435A55A4D4F7B511E7E41"/></P>
<P style="MARGIN: 0cm 0cm 0pt; WORD-BREAK: keep-all; TEXT-AUTOSPACE: ideograph-numeric; TEXT-ALIGN: left; mso-pagination: widow-orphan" align=left><SPAN style="FONT-SIZE: 12pt; FONT-FAMILY: 굴림; mso-bidi-font-family: 굴림; mso-font-kerning: 0pt"><FONT color=#000000></FONT></SPAN></P>
<P style="MARGIN: 0cm 0cm 0pt; WORD-BREAK: keep-all; TEXT-AUTOSPACE: ideograph-numeric; TEXT-ALIGN: left; mso-pagination: widow-orphan; mso-margin-top-alt: auto; mso-margin-bottom-alt: auto" align=left><SPAN style="FONT-SIZE: 12pt; FONT-FAMILY: 굴림; mso-bidi-font-family: 굴림; mso-font-kerning: 0pt"><v:shape id=_x0000_i1031 style="WIDTH: 139.5pt; HEIGHT: 102pt" alt="" type="#_x0000_t75"></v:shape></SPAN></P>
<P style="MARGIN: 0cm 0cm 0pt; WORD-BREAK: keep-all; TEXT-AUTOSPACE: ideograph-numeric; TEXT-ALIGN: left; mso-pagination: widow-orphan; mso-margin-top-alt: auto; mso-margin-bottom-alt: auto" align=left><SPAN style="FONT-SIZE: 12pt; FONT-FAMILY: 굴림; mso-bidi-font-family: 굴림; mso-font-kerning: 0pt"><FONT color=#000000>&nbsp;</FONT></SPAN></P></TD></TR>
<TR style="HEIGHT: 15pt; mso-yfti-irow: 7; mso-yfti-lastrow: yes">
<TD style="BORDER-RIGHT: #ebebeb; PADDING-RIGHT: 0cm; BORDER-TOP: #ebebeb; PADDING-LEFT: 0cm; PADDING-BOTTOM: 0cm; BORDER-LEFT: #ebebeb; WIDTH: 121.5pt; PADDING-TOP: 0cm; BORDER-BOTTOM: #ebebeb; HEIGHT: 15pt; BACKGROUND-COLOR: transparent" vAlign=top width=162>
<P style="MARGIN: 0cm 0cm 0pt; WORD-BREAK: keep-all; TEXT-AUTOSPACE: ideograph-numeric; TEXT-ALIGN: left; mso-pagination: widow-orphan" align=left><SPAN style="FONT-SIZE: 12pt; FONT-FAMILY: 굴림; mso-bidi-font-family: 굴림; mso-font-kerning: 0pt"><FONT color=#000000>&nbsp;</FONT></SPAN></P></TD></TR></TBODY></TABLE></P>
<P style="TEXT-ALIGN: center">&nbsp;</P>
<P>&nbsp;</P>
<!-- -->
카페 게시글
정보공유
아마릴리스 씨앗 싹틔우기 (펌)
여름날
추천 0
조회 509
11.02.07 14:09
댓글 17
다음검색


첫댓글 좋은 방법인거 같아요 . 저도 올해는 저렇게 해봐야겠어요
올해..시험해볼 것들이 많군요,,,,'
현재는 1, 물에 뛰워서....2. 티슈에 물을 적셔 밀봉하는것....
또 없나요.....
예,,이 방법이 최고더라구요.. 저도 최근엔 이것만 쓰고 있는데요.
저도 티슈를 이용한 방법을 써 봐야겠습니다
아하

또 이런 방법이 있군요. 감사합니다.
좋은 정보 감사합니다. 올해 저도 이 방법을 사용해 보아야 하겠네요. 그림만 봐도 이해하시겠지만..
혹시 몰라서, 감사한 마음으로 제가 간단히 번역하겠습니다.
1단계: 두 겹 짜리 (크리넥스) 티슈 4장을 접시에 놓는다. 한 숟가락 정도의 물을 휴지에 흡수시킵니다
2단계: 3~6cm 정도 간격으로 휴지 가운데 쪽으로 씨앗들을 정렬 시킵니다.
3단계: 왼쪽의 1/3정도를 가운데로 향하도록 부드럽게 접어 씨앗을 덮습니다. 그 다음 오른쪽의 것을 가운데 쪽으로 향하도록 나머지 씨앗들을 덮습니다. 휴짓장을 누르지 마세요. 느슨하게 포장된 것같이 씨앗들을 감싸고 있어야 합니다.
4단계: (위의) 새로 만들어진 꾸러미를 이중 지퍼팩에 집어넣습니다. 완전히 잠가서 수분을 잃지 않도록 합니다. 휴지와 씨앗이 눌러지지 않게 조금의 공기를 남겨두세요.
5단계: 형광등 불빛 아래에 놓아둡니다. 2~4주내에 조심스럽게 열어서 씨앗이 자라는지 확인해 보세요.
6단계: 뿌리가 자라면 휴지는 조심스럽게 벗겨냅니다. 만약 휴지가 잘 벗겨지지 않는다면 스프레이로 물을 조금 뿌려보세요. 보통 완전히 휴지를 제거할 수는 없는데, 조금의 휴지는 상관없습니다(시간이 흐르면 분해됩니다)
7단계: 새로 형성된 구근 부분(사진에 연필로 가르키는 부분)을 습기가 있는 배양토에 뭍히지 않도록(바로 표면 위에) 심습니다. 뿌리의 끝이 흙으로 향할 수 있도록 조심스럽게 눌러 줄 수 있습니다.
8단계: 적당한 습기의 흙(과습 금물)과 강하지 않은 빛을 지켜주며, 활착되기 전까지 흙을 말리면 안됩니다. 모구처럼 잘 보살피면 3~5년 후면 꽃을 보실 수 있을 것입니다.
번역 감사드립니다.
좋은 정보 감사합니다. 좋은 방법 중의 하나네요. 휴지와 뿌리를 분리할때만 좀 조심하면 간편하고 안전한 방법이네요.
좋은 정보 감사합니다...^^
충분한 수분을 유지하면서
공기층과 접촉함으로써 씨앗이 썩지 않는 점을 생각하면 정말 좋은 방법이네요.
진작 봤으면 따라햇을텐데...흙속에서 썩고 있는거 같아요..
여러 시행착오를 겪으며 고수가 되는거겠지요.
저는 씨앗을 심으며 너무 많이 나면 어찌 다 키울까 걱정합니다.
지나친 관심으로 인한 과습보다는 적당한 무관심이 오히려 식물에는 유익한 것 같습니다.
저도 올겨울 지내면서 월동이 안되는 애들은 버리고 있어요. 기후에 맞는 식물을 키우는것도 중요한거 같아요.
여름날님 말씀에 10000표!!!!!!!!!
지난친 관심보다.....무관심이 식물에게 진짜로 유익합니다...
지난친 관심으로 넘 잘 죽이는 1인....크크
좋은 정보네요 감사합니다......