<TABLE height="100%" cellSpacing=0 cellPadding=5 width="100%" align=center
border=0>
<TBODY>
<TR>
<TD vAlign=top width="908">
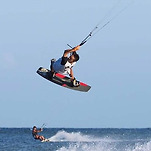
<P><FONT size=2>Sky Solbach breaks the Back Mobe down into a three part trick
tip: an unhooked Back Roll, <br>Back Roll to Toeside, and finally the full on Back
Mobe. <br>This video will have you nailing your Back Mobes in no time. This video tip is from the North team video. </FONT></P>
<EMBED pluginspage=http://www.macromedia.com/go/getflashplayer
src="http://www.sbckiteboard.com/common/js/external/jw_media_player/mediaplayer.swf" width=360 height=245 type=application/x-shockwave-flash
flashvars="file=http://www.sbckiteboard.com/uploads/Media/1d995e80eadaeb357a4452623585df33.mov.flv" allowNetworking='internal' allowScriptAccess='sameDomain'></EMBED><P><FONT size=2><EM>Here is a Kite Camp instructional about the Back Mobe from
SBC Kiteboard (Issue #23).</EM></FONT> </P>
<P><FONT size=2><BR><STRONG>Back Mobe</STRONG><BR><EM>words by Clinton
Bolton<BR>photos by Gavin Butler</EM><BR><BR><EM>The Back Mobe is the first step
in taking your handlepasses to the next level. <br>There is a big difference between
the first handlepass, which everyone starts off learning, <br>the high handlepass,
when sending the kite past 12 o’clock (Issue 19), <br>and the more advanced Back
Mobe. The Back Mobe is a handlepass with an added 360. <br>You also need to keep the
kite low (at 45 to 55°), using just the board to give you the pop and height to
initiate the trick.</EM><BR><BR><STRONG>Getting started</STRONG><BR>In doing
this trick, the kite will be low and powered, so it’s best to stretch first to
help prevent injury. <br>Make sure you have a strong leash and safety system. <br>If you
have a fifth-line attachment, attach your leash to the fifth line. <br>Be sure that
you have plenty of space to practise with no one riding close by. <br>You’ll be
surprised how far a low-angled and powered kite can take you. <br>Don’t try this
trick too close to shore.<BR><BR><STRONG>What you need to know before doing the
Back Mobe:</STRONG><BR>Speed—come in with moderate speed as you would to boost
for a jump.<BR>Edge hard—this will help you get the height you need when you
pop.<BR>Bar position—close to your hips makes the pass
easier.<BR>Rotation—rotating quickly helps to make passing the bar
easier.<BR><BR>Make sure you’re not too powered. It’s best to learn unhooked
tricks slightly underpowered. <br>You must be confident enough to do a handlepass
before attempting the Back Mobe.<BR></FONT></P>
<TABLE border=0 width="845">
<TBODY>
<TR>
<TD width="334"><FONT size=2>1. Come in at moderate speed. <br>Because it’s your first time
trying this trick, make sure your leash is on your back-hand side so you won’t
get wrapped up in your leash. <br>Position the kite a little higher than 45°, at
about 55°, giving you plenty of height and time. <br>This will make your first
attempt easier.</FONT></TD>
<TD width="250"> <IMG
title="Back Mobe - Step 1" height=375 alt="Back Mobe - Step 1"
src="https://img1.daumcdn.net/relay/cafe/original/?fname=http%3A%2F%2Fwww.sbckiteboard.com%2Fuploads%2FImage%2FTrick%2520of%2520the%2520week%2FBAckmobe1.jpg" width=250></TD><TD width="247"><IMG title="Back Mobe - Step 2" height=375 alt="Back Mobe - Step 2"
src="https://img1.daumcdn.net/relay/cafe/original/?fname=http%3A%2F%2Fwww.sbckiteboard.com%2Fuploads%2FImage%2FTrick%2520of%2520the%2520week%2FBackmobe2.jpg" width=250></TD></TR>
<TR>
<TD width="334"><FONT size=2>2. Now that you’ve placed your kite at 55°, <br>place your front
hand in the centre. <br>I place my hand between the depower line with <br>my index
finger and middle finger between the line and my back hand right next to my
index finger of my front hand.</FONT></TD>
<TD width="250"><IMG title="BAckmobe - Step 3" height=375 alt="BAckmobe - Step 3"
src="https://img1.daumcdn.net/relay/cafe/original/?fname=http%3A%2F%2Fwww.sbckiteboard.com%2Fuploads%2FImage%2FTrick%2520of%2520the%2520week%2FBackmobe3.jpg" width=250></TD><TD width="247"><IMG
title="Backmobe - Step 4" height=375 alt="Backmobe - Step 4"
src="https://img1.daumcdn.net/relay/cafe/original/?fname=http%3A%2F%2Fwww.sbckiteboard.com%2Fuploads%2FImage%2FTrick%2520of%2520the%2520week%2FBackmobe4.jpg" width=250></TD></TR>
<TR>
<TD width="334"><FONT size=2>3. Unhook and edge hard. The kite should remain in the same
position when you unhook and throughout the trick.</FONT></TD>
<TD width="250"> </TD><TD width="247"> </TD></TR>
<TR>
<TD width="334"><FONT size=2>4. Release your edge and try to look over your front shoulder.
<br>This will help you go into the back rotation.</FONT></TD>
<TD width="250"><IMG title="Step 5" height=375 alt="Step 5"
src="https://img1.daumcdn.net/relay/cafe/original/?fname=http%3A%2F%2Fwww.sbckiteboard.com%2Fuploads%2FImage%2FTrick%2520of%2520the%2520week%2FBackmobe5.jpg" width=250></TD><TD width="247"><IMG
title="Step 6" height=375 alt="Step 6"
src="https://img1.daumcdn.net/relay/cafe/original/?fname=http%3A%2F%2Fwww.sbckiteboard.com%2Fuploads%2FImage%2FTrick%2520of%2520the%2520week%2FBackmobe6.jpg" width=250></TD></TR>
<TR>
<TD width="334"><FONT size=2>5. Pull the bar toward you, making sure to bring it close to
your hips. <br>Bring your knees toward you while still halfway into the rotation. <br>
This will help bring the board up while pivoting your weight around, allowing
you to rotate the extra bit to finish the trick and grab the bar.</FONT></TD>
<TD width="250"><IMG title="Step 7" height=375 alt="Step 7"
src="https://img1.daumcdn.net/relay/cafe/original/?fname=http%3A%2F%2Fwww.sbckiteboard.com%2Fuploads%2FImage%2FTrick%2520of%2520the%2520week%2FBackmobe7.jpg" width=250></TD><TD width="247"><IMG
title="Step 8" height=375 alt="Step 8"
src="https://img1.daumcdn.net/relay/cafe/original/?fname=http%3A%2F%2Fwww.sbckiteboard.com%2Fuploads%2FImage%2FTrick%2520of%2520the%2520week%2FBackmobe8.jpg" width=250></TD></TR>
<TR>
<TD width="334"><FONT size=2>.6. Release your front hand and bring it behind your back to
grab the bar from your back hand while trying to keep the bar as close as
possible to your body. <br>The faster you get your rotation, the easier it will be
to grab the bar.</FONT></TD>
<TD width="250"><IMG title="Step 9" height=375 alt="Step 9"
src="https://img1.daumcdn.net/relay/cafe/original/?fname=http%3A%2F%2Fwww.sbckiteboard.com%2Fuploads%2FImage%2FTrick%2520of%2520the%2520week%2FBackmobe9.jpg" width=250></TD><TD width="247"><IMG
title="Step 10" height=375 alt="Step 10"
src="https://img1.daumcdn.net/relay/cafe/original/?fname=http%3A%2F%2Fwww.sbckiteboard.com%2Fuploads%2FImage%2FTrick%2520of%2520the%2520week%2FBackmobe10.jpg" width=250></TD></TR>
<TR>
<TD width="334"><FONT size=2>7. Now that you’ve grabbed the bar, pull with your front hand
while still looking over your front shoulder and pushing your back leg in the
direction you’re rotating to bring the board in the heelside position. <br>Combining
all these things helps pivot your weight around, allowing you to keep rotating
in order to finish the trick.</FONT></TD>
<TD width="250"><IMG height=375 alt=" "
src="https://img1.daumcdn.net/relay/cafe/original/?fname=http%3A%2F%2Fwww.sbckiteboard.com%2Fuploads%2FImage%2FTrick%2520of%2520the%2520week%2FBackmobe11.jpg" width=250></TD><TD width="247"><IMG
height=375 alt=" " src="https://img1.daumcdn.net/relay/cafe/original/?fname=http%3A%2F%2Fwww.sbckiteboard.com%2Fuploads%2FImage%2FTrick%2520of%2520the%2520week%2FBackmobe12.jpg"
width=250></TD></TR>
<TR>
<TD width="334"><FONT size=2>8. Try grabbing the bar with your back hand so that you can
keep the kite under control. <br>Spot your landing and bend your knees to absorb
impact.</FONT></TD>
<TD width="250"><IMG height=375 alt=" "
src="https://img1.daumcdn.net/relay/cafe/original/?fname=http%3A%2F%2Fwww.sbckiteboard.com%2Fuploads%2FImage%2FTrick%2520of%2520the%2520week%2FBackmobe14.jpg" width=250></TD><TD width="247"><IMG
height=375 alt=" " src="https://img1.daumcdn.net/relay/cafe/original/?fname=http%3A%2F%2Fwww.sbckiteboard.com%2Fuploads%2FImage%2FTrick%2520of%2520the%2520week%2FBackmobe16.jpg"
width=250></TD></TR>
<TR>
<TD width="334"><FONT size=2>9. Now that you’ve landed, softly edge to give you traction
and allow you to keep your speed and ride off.<br> Important: don’t edge too hard
when landing; this will cause you to slide out and butt-check.</FONT></TD>
<TD width="250"><IMG height=375 alt=" "
src="https://img1.daumcdn.net/relay/cafe/original/?fname=http%3A%2F%2Fwww.sbckiteboard.com%2Fuploads%2FImage%2FTrick%2520of%2520the%2520week%2FBackmobe18.jpg" width=250></TD><TD width="247"><IMG
height=375 alt=" " src="https://img1.daumcdn.net/relay/cafe/original/?fname=http%3A%2F%2Fwww.sbckiteboard.com%2Fuploads%2FImage%2FTrick%2520of%2520the%2520week%2FBackmobe20.jpg"
width=250></TD></TR></TBODY></TABLE>
<P><FONT size=2><EM><BR>Clinton Bolton, originally from Durban, South
Africa, rides for Best, Reef, Smith and Da Kine.</EM></FONT> </P></TD></TR></TBODY></TABLE>
<!-- -->